Explore the planet together Let's Go on exciting adventures

Explore together

Discover the most engaging places

m

Exploration

m

Adventures

m

Equipment

Exotic Adventures

Popular Destinations

Hiking is the preferred term, in Canada and the United States, for a long, vigorous walk, usually on trails. The word hiking is also often used in the UK, along with rambling (a slightly old-fashioned term)
m

Explore Alaska

m

Explore Canada

m

Explore Island

Popular stories

Best Experiances

Explore the planet together

Adventures

Watch the video

Alpine Mountains

Alps, a small segment of a discontinuous mountain chain that stretches from the Atlas Mountains of North Africa across southern Europe and Asia to beyond the Himalayas.

Read Our Blog

How much does a humidifier cost?

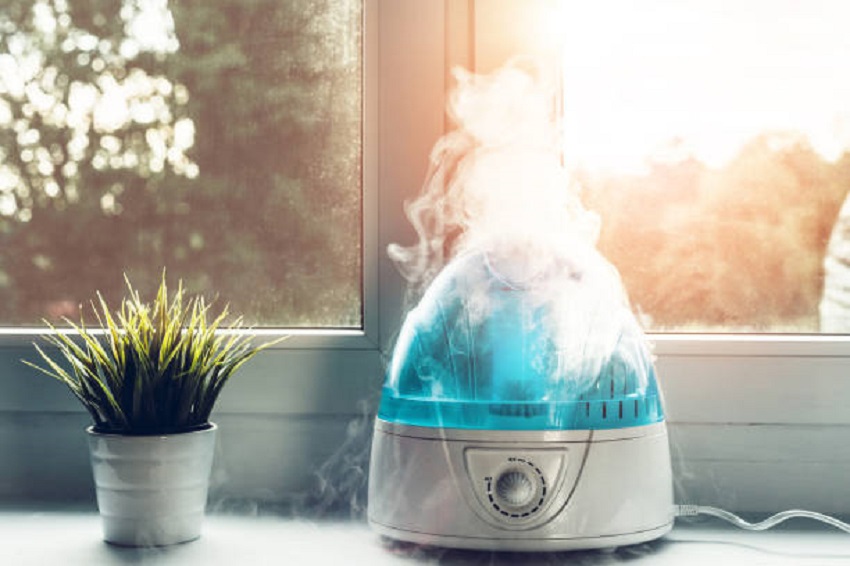
Humidifiers are an essential part of any household that’s suffering from dry air. They’re also a great way to help prevent illness and increase the overall health of your family. But how much do humidifiers cost? You can find out by reading this article how much humidifiers cost.

How much does a humidifier cost?

Trying to figure out how much a humidifier costs can be pretty tricky. If you’ve been looking for the best household products and your research has led you to find this article, then all of us know what kind of struggle is going on in every home that could use some nice help from their humidifiers. No one likes cold air, so if there are children or pets in the house, solving the issue with a new type of humidifier can make a world of difference. Keep reading: Humidifier for eyes

Everything from the type and parts to be used in your humidifiers will come down to what’s available on the niche market at that time you need one. That being said, let’s get into figuring out how much do humidifiers cost today: As far as price is concerned, they are pretty comparable between premium room coolers up to cheaper models, which provide decent amounts of moisture with very little maintenance.

You can get them for a few hundred dollars or even cheaper and that’s if you buy one. Humidifiers also have numerous settings to help change the amount of moisture as well, at different levels by either adding or taking away from water in the system.

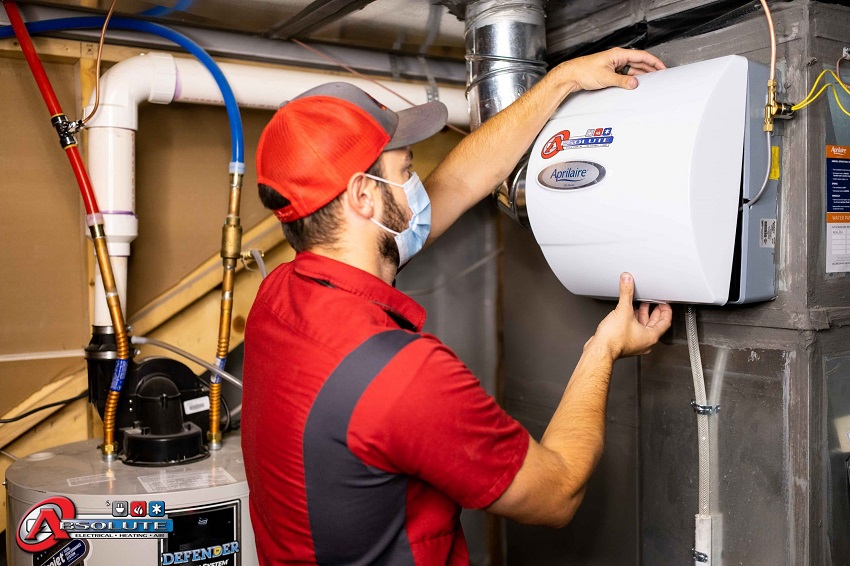
How Much Does a Humidifier Cost to Install?

If you’re looking at the new type of humidifier, then it will range from $120 to over a thousand dollars depending on the company that creates each one.

Anything under twenty-five could be considered cheap, while anything more than a thousand would probably not fit in your financial budget. You can always find bargains, though and some models have discounts offered if you buy in bulk which is especially true among hospital-grade machines, air purifiers, portable coolers, and other similar models that have limited returns.

Types of Humidifier

The most popular types of humidifiers are those that evaporate water. This is the type that typically needs a refill and usually comes with an indicator light to let you know when it needs to be replaced or cleaned. Evaporative coolers use ultrasonic waves or air currents to help break down water into its molecular parts, releasing negative ions, which help combat the dryness in your room while also adding moisture vapor (H2O).

The second type of humidifier is the ultrasonic coolers or warm mist models, which use ultrasound to create heat and a fine mist that adds moisture. The principle behind this type is similar to those found in ultrasonic washer machines. This can cause some awareness issues with pets, though and it’s recommended you keep these closer than 5 feet from your body if possible as they do start at an incredibly high temperature.

The third (and most popular) type of cool mist humidifier is known as the evaporative Evaporative Cool Mist Humidifier. This has been quite popular among people who live in more temperate climates like California, where it can best be compared to a subway-like machine that has artificial seasons year-round, allowing you nearly limitless flexibility with regards to your air and dryness level. Some models are even adjustable, so they can function better throughout certain periods of time during the day. The evaporative coolers also utilize a unique cooler that contains water as its cooling liquid, which can be quite efficient (serving the same purpose as an artificial A/C unit)

Tips to save your cost while using a humidifier

There’s a learning curve for those who want to read about evap humidifiers and how the technology works. Go at your own pace, use these tips and information as you would any other online resource so that in the end you can make an informed decision.

First of all – Safety is incredibly important when using ultrasonic cool mist machines found anywhere inside or outside home infrastructures. Your machine should have temperature sensors on it to avoid over-heating and, of course, begin sensing once it has reached its operating temperature.

Secondly – It is always better to use a more powerful model if one exists. The larger you go with capacity (e.g., gallons per day), the cheaper each gallon will cost (“economy” mode).

Most people are unaware, but only distilled water should be used in your humidifier unit as tap water cannot be safely used inside any form of humidifier. It is also important to avoid using tap water for cleaning the filter and tank of your humidifier machine as it can weaken this element and allow bacteria growth. If a clog has occurred in any of these areas, you may want to look into a whole-house digital scale-capable if possible, which will be able to make easier adjustments later on down the line when needed.

Your average “stand-alone” ultrasonic cool mist machines are on a well-engineered air-cooled chassis with condenser coil and aluminum fins. These machines have been built to maximize the amount of pet hair, dander & dust getting captured in a very large volume (upwards of millions) during their usage

The normal operating temperature is dependent upon evaporator controls that your humidifier has implemented – turned down way low when watering plants or outdoor pets as they need more water than usual would normally require!

Humidity control is important because if your machine’s working temperature reaches up to 130 °F (55 degrees Celsius) – it can damage/destroy the mechanics in these units.

If millions of all kinds of dust, debris & pet hair get caught inside and this particle gets stuck due to an accumulation system clogged with dirt within rotation or static issues causing energy loss through motor vibration problems, one unit after another may eventually stop producing quality mist for health purposes.

Humidifier models like this can produce around 30% humidity control according to the manufacturer’s recommendations, which is not accurate at all if the machine isn’t empowered with an energy-efficient drive system. When these machines are providing low-quality output, it often needs to be cleaned and/or have filters changed frequently within a couple of months’ time depending on usage & environmental conditions that day after day results in condensation inside the unit.

Lastly

As a humidifier, it is a device that produces moisture. It can be used to maintain the humidity in rooms or spaces where humidity levels are low. It’s often used to keep the air fresh and clean. Most humidifiers have an automatic function that will turn on when needed and then turn off again when the water level reaches a certain level. There are two types of humidifiers; forced-air and evaporative. Forced-air humidifiers use warm air from an electric heating element to heat up the water in a tank, which then turns into steam and passes through tubes that cool the steam before it is released into the room or space being treated with humid air. To know more please visit probaby.

Ten fantastic exotic beaches ideal for your vacation

Are you tired of always going to the same place? Or are your holidays super close? This time you will meet ten fantastic exotic beaches ideal for your vacation. As they say out there, in the sea, life is tastier.

How to choose the destination for your honeymoon? 4 tips to achieve it

With so many cities surrounded by attractions, spectacular beaches, and places full of adventure around the world, defining your honeymoon destination is not an easy task. It can be one of the hardest decisions, especially in the middle of wedding planning! But you are not alone, here we will share the best tips to achieve it.

5 tips for easy travel

When you are young, travel planning is often not taken into consideration. Precisely for this reason, here we have included 5 travel tips that can allow every traveler to have less difficulty during their travels.

How To Set Up Your Suspension Bike Top Guideline

Setting up a suspension bike can seem a little bit overwhelming but it’s actually fairly simple to get good by settings.

Today I’m going to show you how to set up your suspension bike in 10 minutes.

Adjustment

One of the things that could seem so hard about setting up suspension is the fact there’s a lot of different adjustments available to you on virtually every modern suspension design.

So we’ve seen that with some tool to make this article they’ve given us a brand new fork and a brand new shock and a fitted them smarter.

Now I’ve never set up some tour before so I’m going to do that right now to show you just how easy that process can be.

There are three main adjustments you need to make to your suspension to get it ready for off-road riding.

For better adjustment, it’s mandatory to know hardtail vs full suspension bike.

There’s the sag there’s the compression and there’s the rebound. The Sag first to the amount of suspension that moves under your body weight when you sit on the bike.

The reason you need sag is so the wheels contract the contours of the ground.

When the wheels are on the ground, you have traction and control. Compression refers to the amount of damping applied to the shock absorbers under the compression.

The reason you need this is to slow that movement down and to absorb impacts. Rebound refers to the way the damping forces are applied to the shock absorbers when they return following a compression.

Now, before we get started, it’s a good idea to get to know your equipment and know where you can find those adjustments. We’ll start by having a quick look at the suspension fork.

Now the air spring is accessible by a cap on the top of the left-hand Lac here and it’s a pretty common position on most brands. Although you might find it on your bike, it has it on the road.

Instead, it’s typically a little cap and it’s a Schrader valve underneath. This is the same type of valve that you’ll find on your car tires next up, or the compression and rebound adjustments.

Compression is always blue or rebound is always red. Compression is normally found on the top of the leg and rebound at the bottom of the leg as far as actually adjusting the damping.

Clockwise adds antsier clockwise or counterclockwise takes it away. There are typically two types of compression adjustment available in forks.

There are those with a multi-position lever for those like this one that has a dial now Outback, I have the tour tri air shock.

This has three points of adjustment. It has air compression and rebound and again the compression is a blue lever here and the rebound is the dial.

Now, this particular shock has 55 millimeters of travel, which out the rear wheel is 150 millimeters.

Now just before we get started, it’s important to say, make sure your compression adjustments are fully unwound or fully open and make sure that the rebound is backed up.

You don’t want any of this stamping to affect the sag setup?

Start by looking at the rear sack. Now find yourself somewhere away from traffic, fairly flat that you can repeat this process.

Now, this can vary on some bike designs outback, and of course of rider preferences. Some people will prefer it slightly softer, and some will like it’s slightly harder.

By pushing the whole ring up against the seal and sitting on the bike to see where it pushes it to. And wherever that amount of space is measure it with your trusty tape measure.

That’s how you can work out if it’s correct or not for you so you gave the ring, push it up to the field on the ship.

Then you’re going to sit on the bike and bounce up and down a bit just to let it settle. So, you’re basically taking your weight off the floor.

Your weight is on the bike and one sited pushed that O-ring back up again, moves the O-ring up against that shaft, and carefully just mount and try not to disturb it too much.

And of course, simply weathering is that’s how much shack you have now? As I said, I’m looking for between 11 and 16 and a half millimeters.

There are 18 millimeters so it’s a touch too soft for me. So, now’s the time to get the shock pump out and make some adjustments.

Connecting Parts

What’s really important to say is where you disconnect the pump, depending on which type of shock pump you have.

You may lose a tiny bit of air and it’s something you need to factor. When you’re actually inflating in the first place, you might need to go slightly put a few more pounds in there just to compensate for that.

Again, personnel ring up to the sale, sit on the bike, let it sort of a bit. So, it’s about there I didn’t carefully climb off again and measure once.

No, in an ideal situation, you would lean upon someone to do this, or perhaps against the workbench or similar, but you can’t do it like this out on the trail. If you get over the bike, you have one pedal. Pull your body weight on that pedal lean over the front of the bike and then your overeating will move.

You will compress it that fork and that is on a slight uphill hair, so it’s not going to make me roll anywhere and that’s a pretty good indication of my body weight on the front of the bike.

We’ll take the tape measure out. At the moment here we are 45 millimeters of sag. Now I actually prefer my front end, a little firmer.

So we go, that is the sack, the rear and the, of the front set up. All we need to do now is get some good base settings for our rebound.

Rebound

Now it’s on to the rebound control. Now, this controls, the extension would be extending of the fog and the shock following a hit.

Now, this has quite an important effect on the handling of the bike. If you have too little rebound damping in place, the bike can feel very bouncy.

It can feel quite uncontrolled and If you have too much damping though, then it’s going to feel quite harsh because the fork and the shock won’t extend fully before the next impact.

Now that something is known as packing down. Now, what you’re looking for when you’re setting up your rebound, is it to be as fast as.

Without packing down now, before we adjust the rebound, it’s important to say that the heavier Ryder you are the more air pressure you’re going to have to have in your forks and shocks.

Therefore, the more rebound damping you can have to have to control it. So what I might have on this bike won’t necessarily be the same as what you will have on your own bike, where you’re looking for is a nice, fast performance.

You don’t want it so fast. It feels out of control and kicking. And you don’t want it so slow that it sticks down after repeated.

On this shock, there are nine clicks of rebound. So, I’m going to start by having four clicks from fully open, and I’m going to work out from there. Now there’s a couple of things to bear in mind with.

This is that if you have a new bike and you’re setting up for the first time, the back end, your bike won’t necessarily be as smooth as it will be.

After a few rides, the shock bushings, they will tend to like wherein slightly be slightly smoother. After their first few rides and they might still need to increase the amount of reading.

Once you’ve initially set it up a good way to check and make sure you’re in the right ballpark is to set your own ring against the shock seal.

Again, right off an obstacle about curb sized and remain seated in the saddle. Now, if it’s too slow, it would just return to the center. If it’s too fast, it will bounce around.

If it’s about right, it will go past the sack point in a little bit and then just settle that’s really what you’re looking for a good base setting and front folks, and a good way to get the same sort of base setting is to return that over into the fork seal.

There’s two there’s one for high speed and there’s one for low speed. What they recommend doing is running the high speed all the way in and just adjusting with the low speed to find your base setting.

Don’t forget these are base settings. This is where you start figuring out how your bike reacts to off-road terrain.

You start with a good base. Then you go and write and learn your bike, learn the trails. As you get to know your bike and you get to know your suspension, fork, and shock a bit better.

You’re going to make some revisions to your up.

Now, the last adjustment you need to make for your base settings is compression. In this case, we’re looking at the shock and you have a lever here.

Now, this controls the low-speed compression. Now, most people refer to open, mid, and closed as the typical settings. But what this actually refers to is the amount of damping you’re getting from the shock in fully open.

You’re actually getting about 20% damping when it’s on the midway, about 60, and then about 80 when it’s full

No, it doesn’t mean it’s locked out, but what this means, you’re getting the maximum low-speed compression.

It makes the bike a bit more efficient when you’re climbing. So, it’s not going to move around too much under your body weight.

Very effective to have that you’re probably going to find it for riding most stuff. You’ll be on the mid-setting and if you want extreme comfort or lots of traction, you can have it on fully open.

You only really want to engage the fully closed section when you’re perhaps climbing a free road or even for urban riding.

Now the same thing applies to your fork. If you have one of those multi-position leavers, but this one has two dials on it.

It has high speed and low speed. Now, if your fork has high and low, start by fully opening, the high-speed leave that one alone for the time.

That is something you will learn as you start writing a bit more and you understand the characteristics, the low speed is the one you need to make your initial adjustments to, to get your good base setting.

So, what you want to do is figure out how many clicks it’s got and go in for about a third of those clicks. Well, there we go.

That is how you set your suspension up in 10 minutes with SAC compression and rebound, where you go now, it’s going to hit those trails and get to know your bike. Don’t forget.

These are just the basics that you can do to get a good base setting for your suspension. I show riding improves and you start to.

Your bike a bit more naturally, you’re going to make some improvements and some increments with changes.

Conclusion

If you love what we do here at champion tech, give us the thumbs-up, and don’t forget to share, and if you want more biking how-to guidelines you can visit OutdoorXsports for better information.

What to see in Cartagena? Top Attractions in Cartagena

Strolling through Cartagena de Indias is like being transported to one of Gabriel García Márquez’s novels or the chronicles of the Spanish conquerors during colonization. Its streets give off history and magical realism in equal measure. The Colombian city, bathed by the waters of the Pacific, is an ideal destination for vacations throughout the year. If you’re still thinking about it, here we tell you what to see in Cartagena de Indias.

Explore